Author

Paul

Common project problems that stop progress

If fixtures arrive misaligned with the design intent, or the promised brightness and color don’t match the sample, the whole schedule slips. Those delays often trace back to unclear specifications, poor photometric data, or a supplier that treats commercial orders like commodity industrial lighting rather than a tailored solution. When you need a reliable track light for display zones or task areas, these issues show up fast and costly.

Diagnosing the real causes

Start with the brief. Vague lumen targets, missing beam angles, and ambiguous mounting details are the usual suspects. Technical root causes to check:- Missing photometric files (IES/LDT) or inconsistent lumen maintenance reporting.- Unverified color rendering (CRI) and correlated color temperature (CCT) claims.- Inadequate mechanical tolerances for the track adapter and connectors.These are not theory — they’re the solid checkpoints I use after reviewing commercial fit-outs for over eight years.

Practical, testable solutions to validate suppliers

Require documentation and quick on-site checks before placing large orders. Ask for:- LM-79 photometric reports and clear LM-80/TM-21 guidance on lumen maintenance.- Samples tested under the same driver and control system you plan to use.- Clear IP and thermal specs for your environment.Bring a portable spectrometer or use a calibrated phone app to compare the sample to spec in situ. Compare the fixture’s beam spread against your layout with a simple mock-up run — one short session saves expensive rework.

How to compare manufacturers without getting lost in marketing

Focus on reproducible metrics rather than glossy images. Evaluate:- Measured vs. claimed lumen output and CRI.- Warranty terms tied to lumen depreciation, not just years.- Availability of consistent spare parts and track adapters.Don’t forget service: a responsive technical contact who provides wiring diagrams and mounting details reduces installation time. If a vendor avoids these specifics, treat that as a red flag.

Pitfalls teams repeat

Avoid these mistakes:- Relying only on photos to approve finishes and color temperature.- Accepting “typical” lumen values without photometric files.- Overlooking track compatibility; some adapters fit poorly across systems.Plan for driver and control compatibility early. Otherwise, you’ll retrofit controllers or replace heads after installation.

Real-world example that clarifies the stakes

A retail rollout on Oxford Street, London, illustrated this clearly: fixtures that matched the brochure failed to highlight product displays because their beam spread and color temperature differed from the approved sample. The project had to pause while engineers sourced compatible heads and adjusted aiming — a logistical headache avoided by enforcing on-site sample validation and clear photometric deliverables.

Alternatives and what to weigh

If a single manufacturer can’t meet your specs, consider:- Mixing heads from a trusted LED module supplier with certified track adapters.- Using a proven driver system and specifying heads that comply with that driver.- Selecting fixtures with replaceable LED modules so aging or color shifts are repairable.Each option involves trade-offs in consistency, warranty coordination, and installation complexity. Match the choice to the client’s tolerance for on-site variation.

Final synthesis

Problems in commercial lighting projects are solvable by narrowing the technical unknowns early, insisting on measurable proof, and choosing partners who document their work. That approach shortens installs and protects the design intent, and for projects that demand reliable track light performance, a partner with detailed specs and consistent supply makes the difference — which is exactly what trieco demonstrates through precise documentation and dependable product lines.

0 comments
0 FacebookTwitterPinterestEmail

Problem: Unklare Gerätekombinationen gefährden Ergebnis und Sicherheit

Zu viele Teams setzen auf Routine statt auf Prüfung — das führt zu Blockaden, verlängerten Eingriffen und erhöhtem Komplikationsrisiko. Gerade wenn ein Koronarer Cutting Ballon geplant ist, stimmt die Gerätekompatibilität oft nicht, weil niemand vorab die Passagen prüft. Beim Europäischer Kardiologenkongress (ESC) 2023 wurde deutlich, dass klare Auswahlkriterien Praxisprobleme reduzieren. Kurz: prüfen, bevor es kritisch wird.

Acht Kriterien, die akute Probleme verhindern

  • Lumen & Saugkraft: Messbare Aspirationsleistung entscheidet über Erfolg bei Thromben; mehr Lumen bedeutet meist stärkere Saugwirkung.
  • Kompatibilität mit Führungsdraht: Stimmt der Drahtdurchmesser nicht, funktioniert weder Passage noch kontrollierbare Führung.
  • Flexibilität vs. Stabilität: Zu starr schädigt, zu weich kann nicht therapieren — Balance ist nötig.
  • Material & Beschichtung: Glatte, thromboresistente Beschichtungen verringern Adhäsion und erleichtern Wiederverwendung im Einsatzprotokoll.
  • Radiopakzität & Markierungen: Sichtbarkeit unter Durchleuchtung ist non-negotiable für präzises Positionieren.
  • Risikoabschätzung Embolie/Dissektion: Designmerkmale, die distal Embolie minimieren, sind bei fragilen Läsionen kritischer Faktor.
  • Geräteinteroperabilität (z. B. Passage des Cutting-Ballons): Der Katheter muss Passage und Inflationsmanöver des Cutting-Ballons erlauben, sonst stoppt die Prozedur.
  • Verfügbarkeit & Support: Ersatzteile, Schulung und Lieferzyklen beeinflussen die Behandlungsplanung unmittelbar.

Konkrete Fehlerbilder und direkte Lösungen

Fehler: Aspirationskatheter zu eng gewählt — Folge: unzureichende Thrombenentfernung. Lösung: Lumen erhöhen oder kombinieren. Fehler: Kein Kompatitätscheck mit Cutting-Ballon — Folge: Ballon lässt sich nicht an Position bringen. Lösung: Testpassage am Modell vor Eingriff. Fehler: Unzureichendes Spülen — Folge: Thrombenverschleppung. Lösung: Standardisiertes Flushing-Protokoll und kontrollierte Saugzyklen. Diese Maßnahmen sind sofort umsetzbar und reduzieren Reinterventionen.

Vergleich: Alternativen und Kombinationen

Direkte Aspiration versus mechanische Thrombektomie: Aspiration ist schneller für frische Thromben, mechanische Systeme bieten oft bessere Kontrolle bei fibrösem Material. Kombination mit einem Cutting-Ballon kann Plaque-Läsionen besser öffnen, darf aber nur erfolgen, wenn Passage und Druckprofil zusammenpassen. Prüfen Sie, ob ein Single-Device-Workflow möglich ist oder eine klar definierte Reihenfolge (Aspirieren → Ballon → Nachkontrolle) sinnvoller ist.

Praxis-Checkliste vor dem Eingriff

  • Passage-Test am Modell: Führungsdraht + Katheter + Ballon.
  • Flushing- und Aspirationstest mit definierten Volumina.
  • Röntgenmarkierung prüfen und Zielposition simulieren.
  • Notfallplan für Embolie-Management bereitlegen.
  • Teambriefing: Verantwortlichkeiten und Wechselintervalle festlegen.

Fazit

Probleme bei Aspirationskathetern sind vermeidbar, wenn Auswahl systematisch nach klaren Kriterien erfolgt und Interoperabilität mit Geräten wie dem Koronaren Cutting-Ballon geprüft wird. Präzise Vorbereitung reduziert Komplikationen und Eingriffszeit; deshalb entscheiden sich erfahrene Teams für verlässliche Produktlinien und transparente Lieferstrukturen wie bei SWLMed, die die technische Abstimmung und Versorgungssicherheit unterstützen.

0 comments
0 FacebookTwitterPinterestEmail

Comparative insight into compact beam fixtures

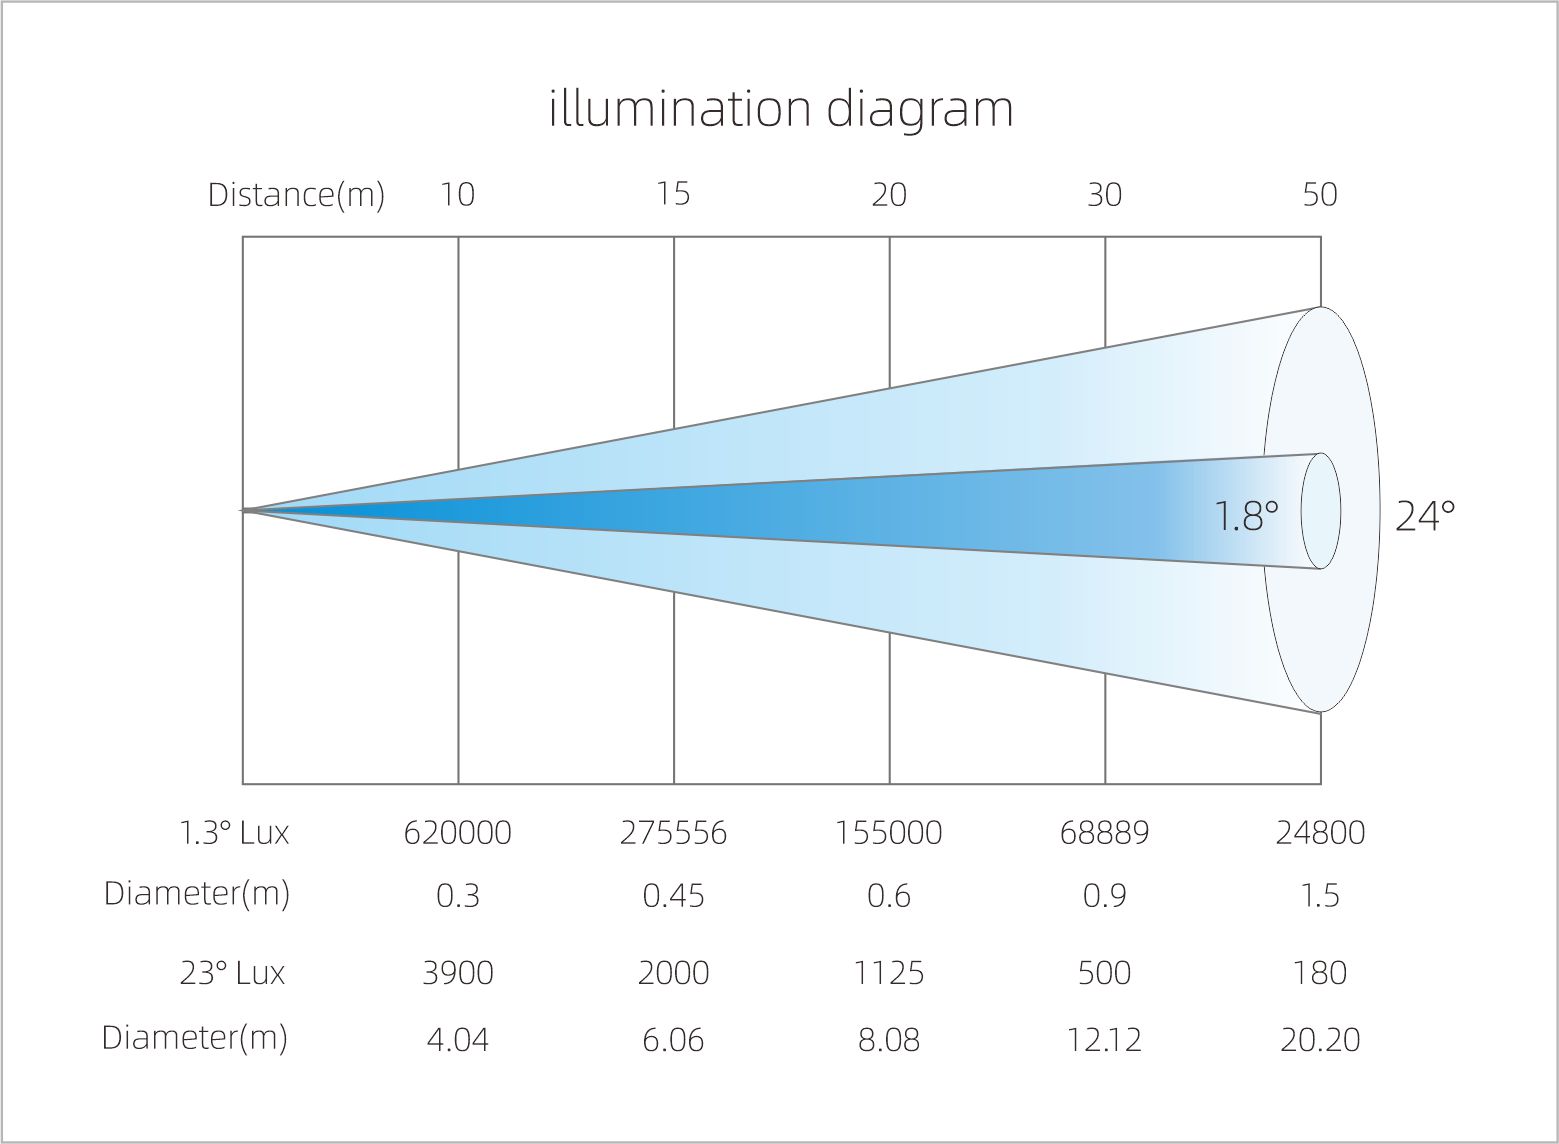
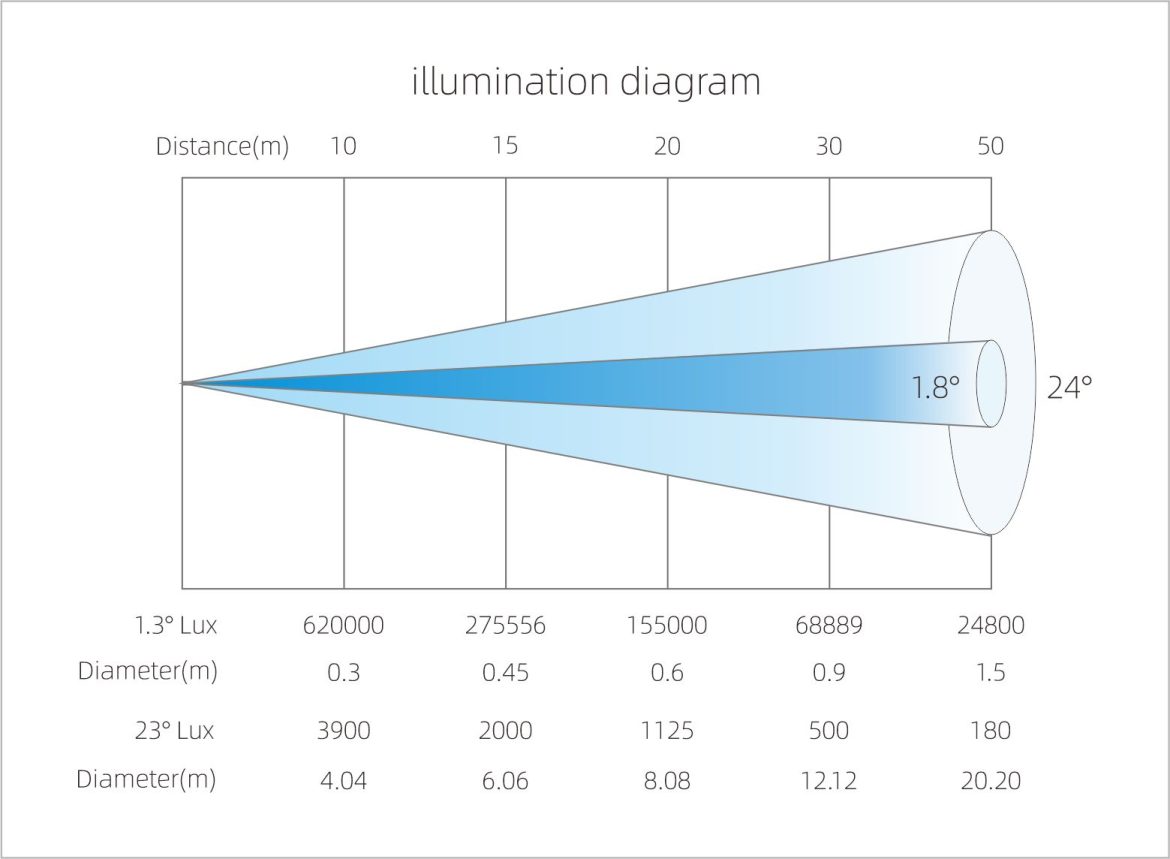
In the realm of professional stagecraft, a clear preference has arisen for compact fixtures: the mini beam moving head, whose precision and intensity belie its modest frame. Contemporary riggers often pair a model such as the 3in1 BSW moving head beam light with arrayed wash units; this combination permits tight beams and rapid positional changes while conserving flown weight. Such choices mirror decisions surrounding the broader category of moving head beam light deployments at high-profile events, and they derive from comparative analysis of output, control, and footprint.

3in1 BSW moving head beam light

Performance and mechanics

Mini beam movers deliver concentrated lumen output within narrow beam angles, producing the sort of razor-edge shafts prized for architectural highlights and televised concerts. Their optical path commonly employs a focused reflector and a compact zoom mechanism; the result is a beam that maintains intensity across distance. Control remains professional-grade: DMX channels afford pan/tilt choreography and gobo indexing, and the fixture’s thermal management sustains lumen stability over prolonged runs. Installers appreciate the reduced truss load without concession to photometric needs.

Operational production teardown — practical language for technicians

One must examine the unit as a whole: power entry, signal chain, cooling, and serviceability. Begin with the power module and note inrush current and duty-cycle tolerances; next, confirm DMX termination and profile mapping so the console can address pan/tilt and gobo banks precisely. Replaceable gobos and modular fans ease maintenance on the fly. For clarity in procurement and scripting, embed {main_keyword} and {variation_keyword} into the operational paperwork to ensure lighting programmers and stage electricians reference identical nomenclature when patching. This practice reduces callbacks and expedites load-in.

Use cases and a real-world anchor

Large-scale productions—most memorably the 2012 London Olympic opening ceremony—accentuated how discrete beams cut through smoke and camera lenses to define sightlines. Mini beam movers excel in television studios, touring rigs, and mid-sized arenas where sightlines and broadcast cameras demand tight control of beam angle and spill. They perform likewise in architectural façades, where pan/tilt precision sculpts light across masonry without overwhelming neighbours.

Common mistakes and alternatives

Practitioners sometimes over-rely upon fewer, high-output fixtures where an array of minis would grant greater shaping and redundancy. Mistakes include excessive zoom at long throw—diminishing perceived contrast—and neglecting proper DMX addressing, which creates jumpy pan/tilt cues. Alternatives exist: larger beam fixtures offer longer throw but incur greater weight and power; LED profile spots provide crisp framing but lack the concentrated punch of a beam. A balanced rig often pairs mini beams with a handful of profiles and outsized strobes for impact—this hybrid yields both texture and presence.

Summary of comparative insights

Compared against larger units, mini beam movers win on placement flexibility, lower rigging complexity, and creative multiplicity. They require careful attention to signal integrity and thermal cycles, yet reward the designer with nimble effects and clean aerial shafts. The trade-offs are clear: sacrifice raw throw for tighter arrays and faster dynamics—an acceptable exchange in many professional contexts.

3in1 BSW moving head beam light

Golden rules for selection and deployment

1. Metric of output: verify lumen distribution at intended throw distance and confirm beam angle retains intensity over that span. 2. Control fidelity: require full pan/tilt step resolution and reliable DMX/RDM responsiveness. 3. Operational resilience: prefer fixtures with serviceable fans and quick-access optical modules. Apply these three metrics as your filter when specifying fixtures for tour, broadcast, or fixed installation.

Professionals will find that adherence to these rules shortens load-in time, reduces on-site failures, and refines artistic intent—proof enough that sensible engineering equals creative freedom. —

Light Sky has refined these principles into product lines and support that satisfy both the technician and the designer; experience and empiricism inform that conclusion.

0 comments
0 FacebookTwitterPinterestEmail